Top Menu
Control what your staff can see and edit in Volo.
Individual Permissions can be setup under the Permissions option in the Staff section. You can also assign members to a Staff Group (go to Staff>Groups>Add Group to create a list of members that will all have the same permissions). Remember, group permissions will always override the individual permissions, so if they are assigned to a group, you would need to remove them from the group to setup individual permissions.
Three Basic Types of Access:
Hide: this will hide that menu item or option completely from the staff member.
Read only: in this setting, the staff member will see the information in the area but will not be able to edit it.
Read/Write: with this permission level, the staff member will have full access to view and edit everything in the area that was selected
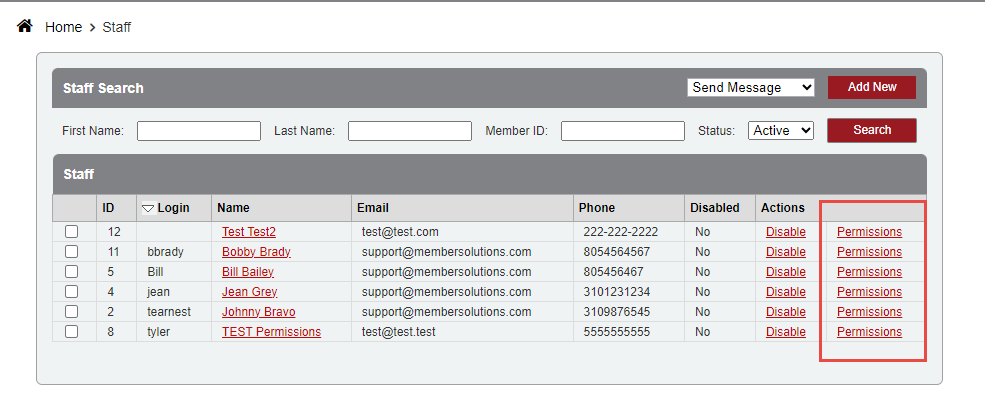
Set Staff Individual Permissions
Click Staff
Click Search
Select the Permissions link next to the staff member desired.

Top Menu
For the Top Menu, select each area that you want the staff member to have access to, and what kind of access. This will allow them to see the Menu items. In each section below the Top Menu, you can choose what type of permission is allowed for each Menu item.
Note: If you don’t enable permissions on the top level navigation to a certain area but enable permissions within that area, the top level navigation permissions will override that permission. If they are not able to get to that Menu item, they will not have permission in that section at all.
Check Landing Page for the what screen will show when the staff member logs in.
If you Hide Staff, but allow access to Staff Own Profile, your staff member will only see their information.

Check-In
Check Allowed if staff should have access to Check In>Kiosk

Schedules
Set permissions per schedule or for all schedules. You will need to click OK at the bottom after you set permissions for each schedule so that it will save the changes. Note: Week View Only will allow the staff user to only see their appointments/classes on the schedule in the week view and no other staff member’s appointments.

Students
Set permissions for Students/Members for each profile tab.

Instructor
Set permissions for staff profiles.

Reports
Set permissions for All Reports by clicking Read Only at the top of the column, or or set permissions for each report individually.

Setup
Set permissions options for the setup area. Click OK when done to save all permissions.
